What is the HADR_SYNC_COMMIT Wait Type?
Before we start, one thing to get cleared
is that, in AlwaysOn High-Availability, the transaction hit on a primary server
first gets committed on the secondary and only then comes back to commit on
primary.

The HADR_SYNC_COMMIT wait type represents
the time taken by the secondary replica to acknowledge the harden log records
to the primary replica. As soon as a transaction is started in the primary replica,
the HADR_SYNC_COMMIT wait type starts. Once it starts, the transaction is moved
to the secondary replica for hardening into the log. The HADR_SYNC_COMMIT wait
time will only end when the secondary replica acknowledges that the transaction
was committed on the secondary replica. This scenario happens when the AlwaysOn Availability
Group is set to synchronous mode.
In a production environment, it is normal to
experience HADR_SYNC_COMMIT wait type on your AlwaysOn Availability Group
setup.
Reasons for HADR_SYNC_COMMIT Wait Types:
1. Intermittent network connection
between primary and secondary replica.
2. Performance issues on storage
subsystem on a secondary replica.
3. High log queue being
transferred from primary to the secondary replica.
How to check a wait type with HADR_SYNC_COMMIT
SELECT *
FROM sys.dm_os_wait_stats
WHERE
wait_type = 'HADR_SYNC_COMMIT'
From the code above, it is easy for you to
figure out the wait types we see on primary as well as the secondary replica. I ran
the above code on my primary replica and got the results as below:

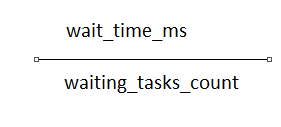
From the figures, you may notice the waiting_tasks_count and wait_time_ms. Both columns represent the number of commands and the wait time respectively taken to commit on secondary and acknowledge on the primary.
How to check the average wait time using this
data:


Fix/Analysis: How to lower the HADR_SYNC_COMMIT wait type?
1. Change the Synchronous mode to Asynchronous
mode of your secondary replica (this can completely remove the HADR_SYNC_COMMIT
wait type)
2. Analyze the log send size, log
send rate, redo queue size, redo rate, and mainly synchronization performance
from AlwaysOn Availability Group dashboard.
Connect to your server à Expand “Always On High Availablity” à Right-click on your Availability Group à Click on “Show Dashboard” à Right-click
on any column and view information

3. Troubleshoot using the DMV –
sys.dm_hadr_database_replica_stats. This contains most of the information related
to AlwaysOn. Additionally, you can check for other DMV too related to AlwaysOn.
All of them start with a prefix as dm_hadr.
4. Add counters on Availability
Replica and check for performance-related issues trapped there.
5. Optimize your query (this is
one of the foremost options to recommend to fellow DBAs and Database developers)
Conclusion
As the HADR_SYNC_COMMIT wait type is purely related to the performance of the secondary replica, it is always recommended checking the secondary replica initially. Try to optimize the query, lower the network intermittency, and avoid overload to the server to lower the wait type.
Note: In the production environment, it is recommended not to constantly switch between the synchronous and asynchronous mode. This could lead to data loss on disaster recovery situations. In case of emergence, perform the switch to Asynchronous, however, get them back to synchronous as early as possible.
You also refer: "LCK_XXX Wait Types"


